Gorgeous and powerful GUI/ button library for Codea projects.
I’m calling it Soda as it is inspired by Cider (but is not a fork).
Features
Simple but powerful parent-child relationship between interface elements
Positions and dimensions of elements are defined relative to the parent of the element (ie the frame or window that they are in). Positions can be defined relative to any edge of the enclosing frame, or as a proportion of the parent frame. Decide a window is too cluttered? No need to move all of the elements around, just resize the parent window.
Elements automatically and intelligently resize when device orientation changes
A collection of elements can be moved around the screen, hidden or made inactive, just by addressing the parent of the collection
Drawing and touching are automatically handled in order to get the correct draw and touch order so that, for instance, it is not possible to touch an element through an overlying window.
Gorgeous and fast-performing graphics
196-sample Gaussian blur shader used for proper drop-shadows and blurred panel effects
True rounded-rectangle mesh with an anti-aliased stroke, allows for translucent rounded-rectangles
Graphics kept largely separate from button logic (in the Style tab), making Soda very easily customisable and skinnable
Interface elements currently supported:
Frame. A container for other UI elements (a window).
Button. One press to activate a callback. Has a variety of built-in defaults for frequently-used interface elements such as the settings gear, the hamburger menu button etc.
Switch. Toggles on and off.
Segment. Horizontally segmented buttons that activate different frames/ panels.
List. A vertically scrolling list of elements that the user can select from. Has elastic snap-back when user scrolls past edge of list. Can easily be set up as a drop down list for auto-populating a text field.
TextEntry. A text entry field with a touchable cursor, and scrolling if the input is too long for the field.
TextWindow. A window for handling scrolling through large bodies of text.
Various alerts and dialogs.
Roadmap
Sliders.
Improvements to TextEntry:
Be able to select a word with a double-tap, or the entire field with a triple-tap.
Be able to scroll the field leftwards by moving the cursor (currently you can only scroll leftward by deleting)
Add a factory for easier creation of the drop-down list seen in the demo
Screenshots
Various buttons in a segmented panel
An alert dialog with a blurred effect
A drop down list for autopopulating a text field
A window for scrolling through large bodies of text
@FLCode nonsense! We all borrow from and are inspired by each other. I started writing this after using Cider, and also being inspired by the discussion of specifications on @Jmv38 's thread. And it adapts @LoopSpace 's rounded rect mesh, etc etc.
Wrt documentation, it’s much easier to learn something if it slopes upward gradually and is not just a cliff!
I suggest a layered approach, starting with the simplest possible examples that make it easy to use Soda in seconds, then adding features layer by layer, with your current documentation as the ultimate reference.
A nice way to do it may be a set of progressively more complex examples in tabs, with a selector parameter to move between them. There are some examples of these “step by step” projects in the wiki, and I can point you to good code for managing it, which was developed some time back by various people.
Once this is fully documented, I’d want to see it as a built-in example, it’s so useful. I’ll definitely be using it in some of my personal projects, since it’s so beautifully designed.
That’s a good idea. Here’s a screenshot of what I have in mind:
You select stages of the tutorial from the menu on the left. These gradually build up the demo step-by-step, and correspond to the tabs in the source code. The (extensively documented) source code is shown in the console at the bottom, and the results of that code appear in the top right.
I might add Codea syntax highlighting to the TextWindow element to make it clearer…
The tutorial is a separate project that uses Soda as a dependency.
Would this be a useful way to document it do you think? Comments and suggestions welcome.
I also added a “known issues” section to the GitHub readme. There’s 2 bugs that I’ll try to track down.
Right now, the instructions are rather overwhelming. It would be nice to be able to just pick up a template off one of your tabs, so I would create some common use cases. Ideally the code in each tab should be standalone. (The code I’m talking about sharing with you allows you to have a setup and draw in each tab, and has just one extra line of code at the top, plus some special code in the main tab).
@Ignatz cool, point me to that code. Although with Soda, the idea is that draw, touched etc stay the same. The only thing the user needs to write is the button constructors. In the tutorial, the only thing that will be different between the different tabs is the button setup function. The Main tab will act as a template, ie with the bare minimum needed to use Soda in setup, draw, touched, keyboard, and orientationChanged.
@yojimbo2000 - this is superb! One minor thing - on my iPad the ? button character is not centred. Don’t know why as it was a straight copy and paste of the code - no modification. I’m on an iPad 3 so may be a legacy issue, or maybe you’re on a prerelease version of IOS.
@West that’s weird, I’ll look into that. It’s the full-width question mark (makes it slightly wider than a regular one) encoded with Lua unicode. Perhaps not all iPads support the same sets of uni code symbols. The other buttons all look ok in your video though. In the Button tab, in Soda.Querybutton, try changing “t.title” from the unicode to just a regular “?” t.title = "?", and see if that displays centred?
Yes that fixed it. The greater than/less than symbols are ever-so-slightly lower than centre, but when I replace by a standard “<” it’s even lower. This is because < is a lowercase symbol in this context so even though the character is correctly centred there is a wee bit of white space above it. Is there an uppercase < symbol I wonder?
This is fantastic, I just finished rewriting my UIManager, but this is very slick indeed…
I went down the route of having panels with layoutmanagers, e.g. flow and grid to auto-layout components… I used a table definition as a DSL (domain specific language) to express the UI in a sort of ‘config’ block to create the hierarchical UI layout…
One thing I found I needed was to express callbacks as the following structure:
callback = {
    self = <an object, optional>,
    function = <a class function or anonymous function>,
    data = <some client data>
}
I then implemented this as:
if(callback) then
    if(callback.self) then
        callback.function(callback.self, callback.data)
    else
        callback.function(callback.data)
    end
end
This then allows you to call back directly into another object function if desired, e.g. a game or view class that owns the UI…
 Various buttons in a segmented panel
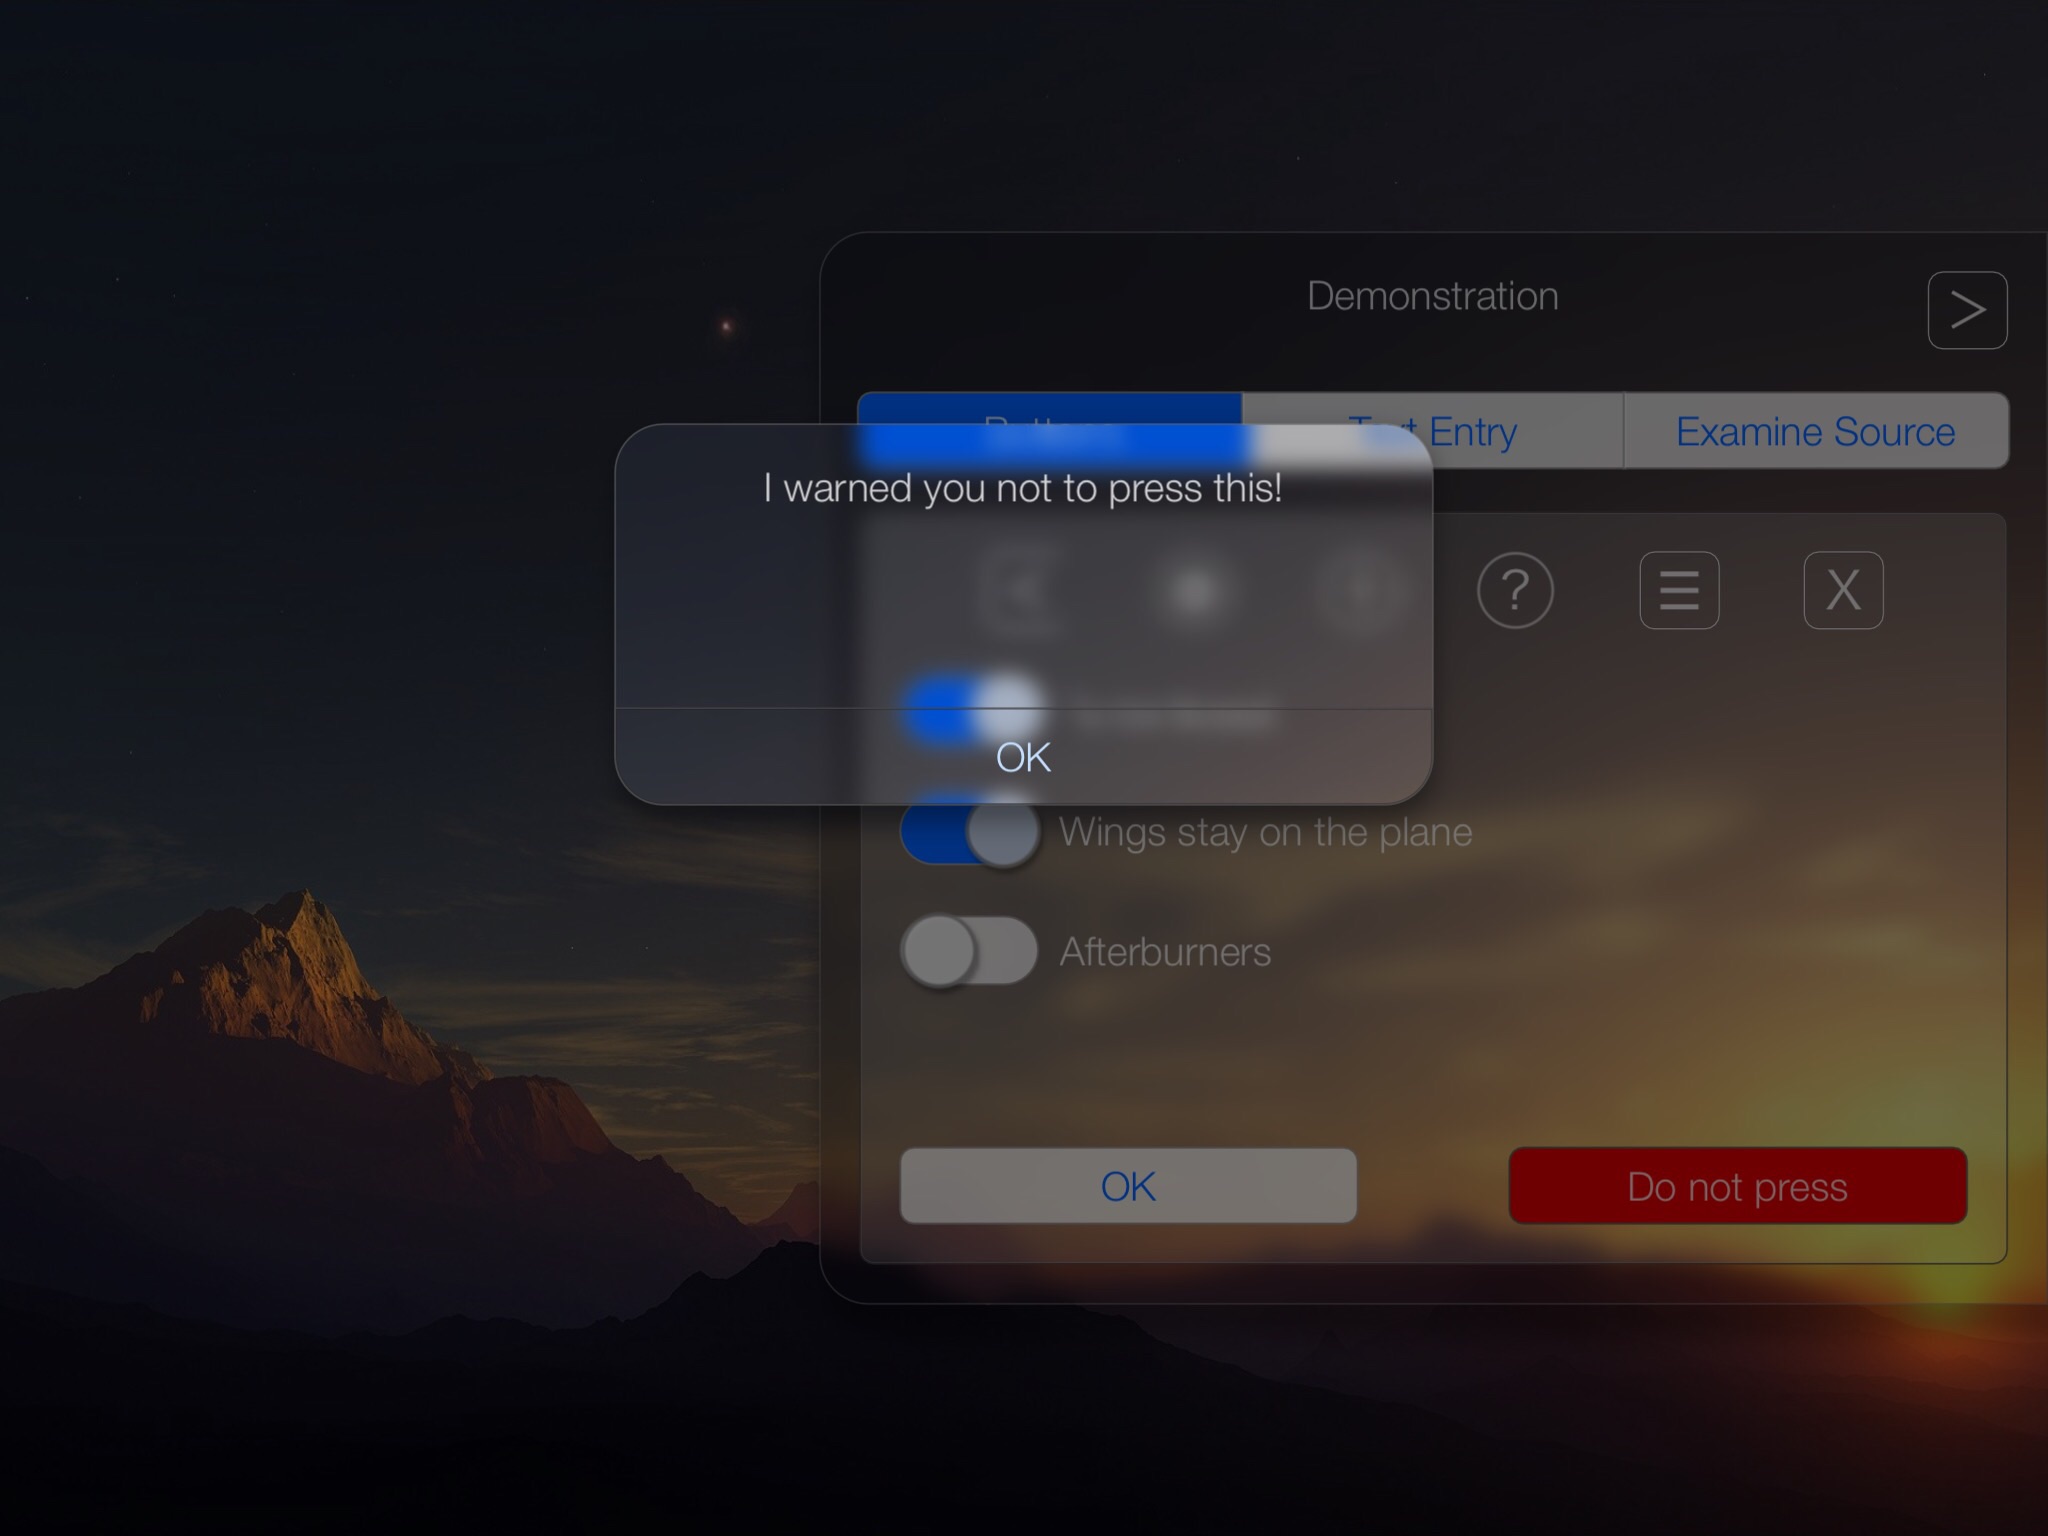 An alert dialog with a blurred effect
 A drop down list for autopopulating a text field
 A window for scrolling through large bodies of text